You’re ready to learn how to lay a concrete driveway and excited about getting your ready-mix concrete order so you can get started.
If you’ve done the preparation work, have the right tools for laying concrete and the driveway installation goes well, you will soon have an attractive concrete driveway you can be proud of. It may last 20-50 years and be the envy of your neighbours.
Multiple factors can affect the finished quality of your concrete driveway and how long it lasts. This article is a step-by-step guide that teaches you how to lay a concrete driveway without making rookie mistakes.
✅ Order ready-mix or volumetric concrete today
✅ Free, fast quote within 24 hours
✅ Call, message or complete our simple online form
Flowmix Tewkesbury: Tel: 01684 217888 Flowmix Walsall: Tel: 01922 741731
Pre-Planning Your Driveway Project
Planning for every stage and eventuality is vital if you want your driveway project to go smoothly.
Planning Permission For A Concrete Driveway
The most often asked question about laying a concrete driveway is whether you need planning permission. You’ll be pleased to learn the answer is straightforward.
If you use porous (permeable) concrete, you don’t need planning permission to lay a concrete driveway. Using permeable concrete is advisable because a non-porous mix increases the risk of flooding, which could cause damage to electrical equipment and property.
Need Expert Advice?
Speak to the team at Flowmix Tewkesbury or Walsall. We are happy to help with all your concrete requirements.
Flowmix Tewkesbury: 01684 217888 Flowmix Walsall: Tel: 01922 741731
Correct Dimensions and Sub-Base
It’s essential to get accurate dimensions before ordering your ready-mix concrete. If you need help with this, contact the Flowmix team for guidance.
Another defining factor is to have a suitable sub-base for the driveway. Compacted hardcore is the popular choice for a sub-base, with a recommended depth of 100mm.
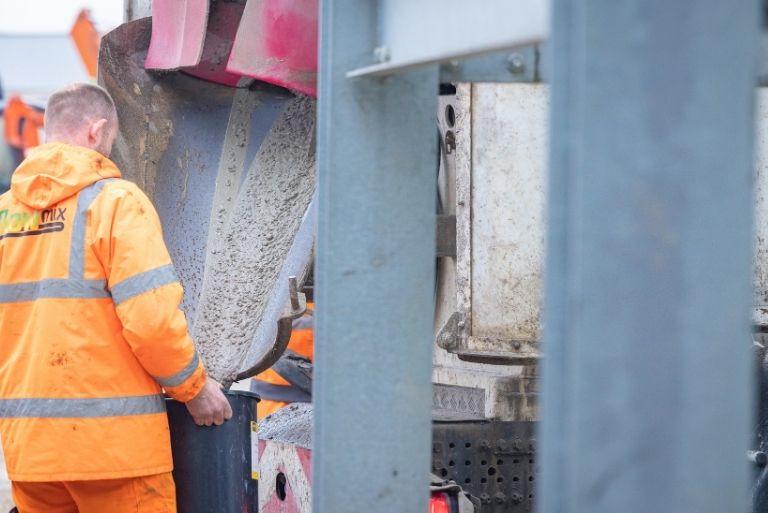
Ordering Your Ready-Mix Concrete In Advance
If you plan to lay a concrete driveway yourself, planning everything with plenty of time to spare is vital. We advise having a contingency plan for unexpected weather conditions or anything that could cause delays. Don’t worry. We can help with any concerns you might have.
The best advice is to call the Flowmix team once you have decided to lay a concrete driveway. We can help you plan your project, advise you on concrete mixes, and book a timed delivery slot when the foundations are down and you are ready to start.
Read: Top 9 Factors Affecting Concrete Strength
How to Lay a Concrete Driveway
Now, we’re down to the nitty-gritty about how to lay a concrete driveway so it will look fantastic and last for decades. Driveway site preparation is essential to doing a good job, so these twelve tips will help you master this epic project.
Step #1: Lay the Perimeter
Use wooden stakes to mark the perimeter of your driveway. Stake them into the ground at determined intervals.
Once completed, check that the outline matches the planned width and length of the driveway.
Step #2: Add Wooden Forms
Adding wooden forms contains the wet ready-mix concrete so it stays in place and doesn’t slide off the sub-base when it’s poured. Ensure the forms are securely anchored to be straight, aligned and remain in place.
Step #3: Dig Out The Topsoil And Level Out The Sub-Base
This step is critical for successfully laying a concrete driveway. The foundations must be solid and level. Dig the topsoil to the required depth. If you’re unsure of the correct depth, contact the experienced Flowmix team for advice.
After adding the sub-base, the next step is to firmly compact it with a plate compactor, which you can hire locally for a reasonable price.
Finally, use a spirit or laser level to check your sub-base is level before laying the concrete.
Step #4: Reinforcing The Concrete
You may not need to reinforce the concrete for your driveway, so this step is optional, depending on whether the driveway will regularly have heavy loads.
Flowmix can advise whether the driveway needs reinforcing with steel rebars or mesh. The chances are, if you’re laying a domestic driveway, reinforcing is unnecessary. However, you might choose this option if you want a super-strong concrete driveway.
Ready to Order Ready-Mix or Volumetric Concrete?
If you are ready to order a ready-mix concrete delivery, speak to the team at Flowmix Tewkesbury or Walsall. We will help you select the right mix and quantities and arrange for fast delivery to your site.
Flowmix Tewkesbury: 01684 217888 Flowmix Walsall: Tel: 01922 741731
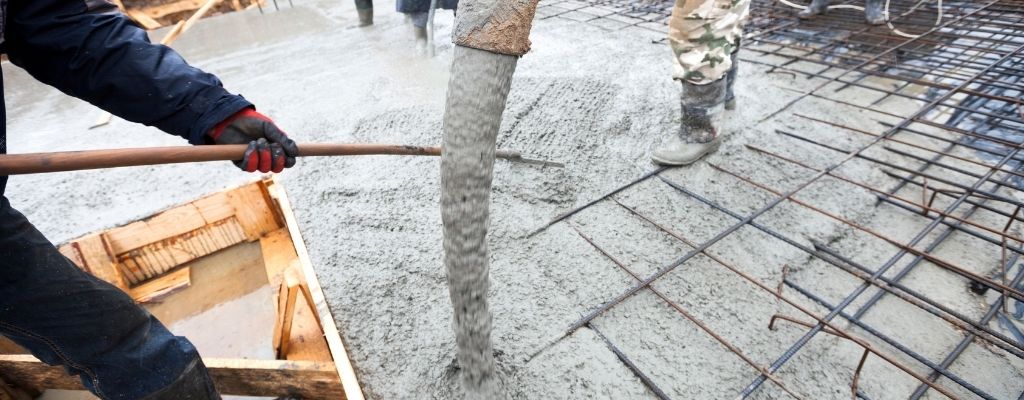
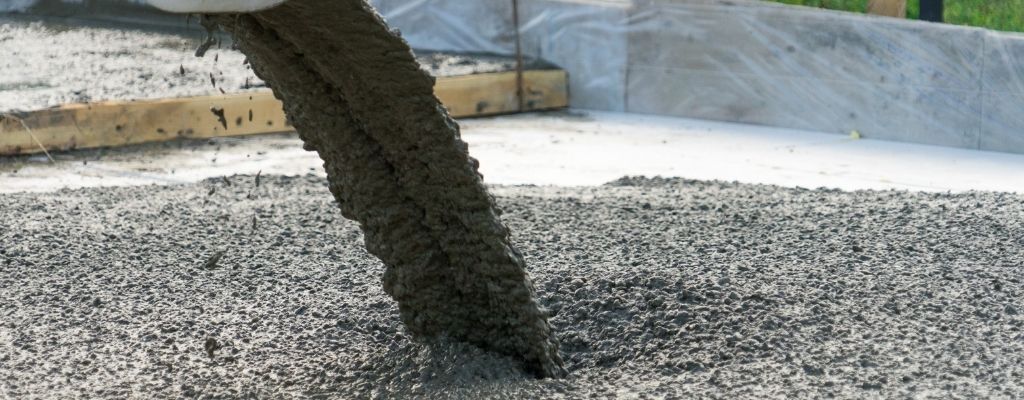
Step #5: Driveway Pouring Process
Plan your concrete delivery for when the weather forecast is above 50°F for around seven consecutive days. Be aware that extreme heat can cause concrete to harden too fast.
When your ready-mix concrete arrives, the experienced Flowmix driver will pour the concrete in even loads. Before delivery, we can advise if you need a concrete line pump. In most cases, unless access to the pour is tricky, we can pour the concrete directly into the forms.
As the drum pours the concrete, you can distribute it on the sub-base using a hoe, aiming to keep it flat and above the top of the forms.
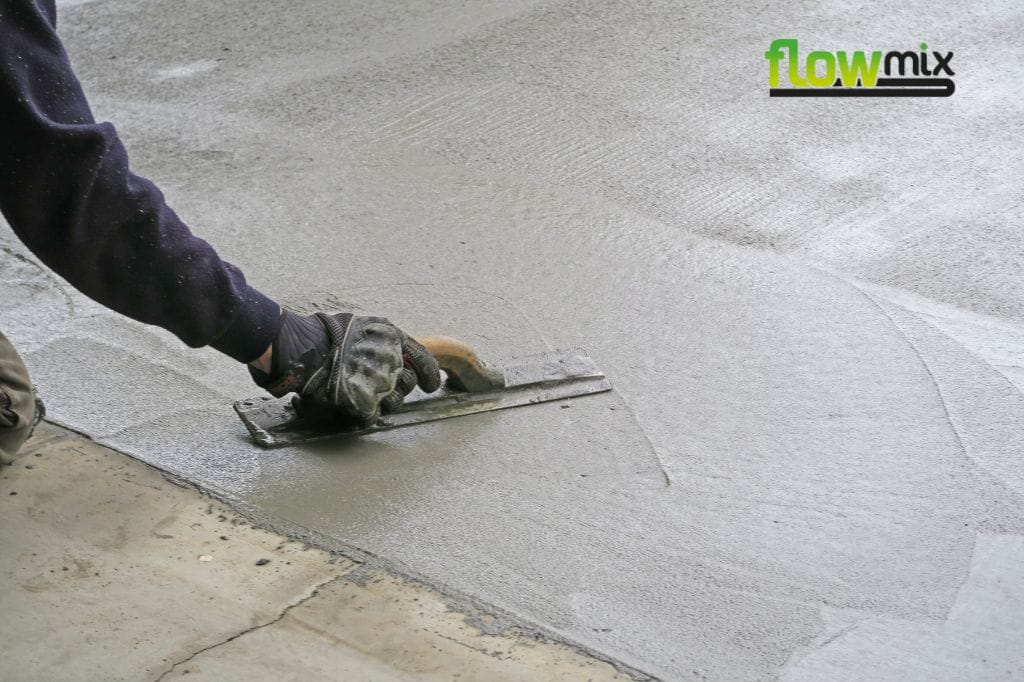
Step #6: Smooth the Surface
Once the concrete is poured, the next step is to flatten it to create a smooth, even surface. Remove excess concrete and level using a straight piece of 2′ x 4′ timber horizontally, moving it backwards and forward across the concrete in a sawing motion.
You will need a concrete float (a simple specialised tool for smoothing concrete once the surface is level) to smooth the surface. Floating helps remove imperfections on the surface of the concrete and helps compact it.
Step #7: Cut in Contraction Joints
Concrete expands and contracts with temperature fluctuations. As it hardens, the volume shrinks. Contraction joints help control the natural shrinking and expansion as the concrete dries.
You will need a grooving tool to cut evenly-spaced expansion joints for concrete, depending on the depth. The suggested spacing for a 4″ deep concrete driveway is around every four feet. If you have concerns about this step, discuss them with the Flowmix team during the planning and preparation stage.
Step #8: Create A Non-Slip Finish
Creating a non-slip finish for your newly laid concrete driveway is simple. Grab a hard-bristled broom and run it evenly across the driveway, sticking in one direction with each stroke. This vital step will aid traction for your vehicles.
Step #9: Curing Your Newly Laid Concrete Driveway
You have completed the hard work; now it’s time to be patient before driving your car onto the driveway.
After around 7-10 days, your drive should be water-cured, which helps keep the concrete surface moist. It helps prevent evaporation, aids heat absorption, minimises shrinkage and distributes temperature evenly.
You can spray, mist or sprinkle water on the surface, ensuring that you don’t use water 5°C cooler than the surface of the concrete as that can cause thermal shock, which can cause the concrete to crack.
Step #10: Remove the Forms
Once the concrete has hardened, carefully remove the stakes and one form at a time. This is usually possible within 24 hours, but it’s advisable to leave for at least 48 hours.
At this stage, the concrete hasn’t fully cured, so take your time and use common sense to remove the forms safely.
Step #11: Edging the Concrete
Concrete finishing techniques can help perfect the final result.
You will need an edging tool for this optional step to help create smooth edges on the driveway. Avoid pressing the concrete down by slightly raising the back or front of the edging tool and using a smooth motion.
Step #12: Using Your Driveway
Curing concrete driveways is the slow part of the job.
Your driveway is ready for vehicles to use around 28 days after pouring. You can easily walk on the concrete after 48 hours, but avoid parking on the driveway until after 28 days.
Taking Care of Your Concrete Driveway
A correctly installed and maintained concrete driveway can last for decades. The following are 3 factors to consider when you lay a concrete driveway: –
- Quality Concrete: Using the right type and mix of concrete to lay your driveway is essential.
- Weather Conditions: Excessive weather conditions like snow, rain and extreme heat can cause a driveway to deteriorate faster.
- Driveway Sealing and Maintenance: Sealing your concrete driveway can help prevent staining and damage from salt and excess moisture. Seal all gaps and cracks to prevent water damage. Driveway sealing and maintenance
Read: Concrete Slump Test: What is it & Why Does It Matter?
Conclusion
Flowmix can provide the correct concrete mix for driveways. We can help you with your plans and advise and guide you every step of the way.
If you are ready to order a ready-mix concrete delivery, speak to the team at Flowmix Tewkesbury or Walsall. We will help you select the right mix and quantities and arrange for fast delivery to your site.
Flowmix Tewkesbury: 01684 217888 Flowmix Walsall: Tel: 01922 741731
How Flowmix Can Help With Your Project
Flowmix has two plants, Gloucester and Walsall. We provide the following services (with time slots):
- Ready-mix concrete, mix on-site (volumetric concrete) and liquid screed.
- Concrete line pump Hire to reduce manual labour and associated costs, increase efficiency, reduce wastage and clean up.
- Interlocking concrete blocks for temporary or permanent barriers.
- Mini-Mix loads up to 4 cubic metres.
Flowmix has the BSA-approved Ready Mix Concrete Kitemark KM683844, a certification that “confirms a product or service’s claim has been independently and repeatedly tested by experts” (source BSI).
Flowmix Tewkesbury: 01684 217888 Flowmix Walsall: Tel: 01922 741731
Flowmix Delivery Areas
| Tewkesbury Plant | Walsall Plant |
| Bourton-on-the-Water | Aldridge |
| Brockworth | Barton-Under-Needwood |
| Chalford | Birmingham |
| Cheltenham | Brownhills |
| Chipping Campden | Burntwood |
| Cirencester | Burton Upon Trent |
| Droitwich Spa | Cannock |
| Evesham | Coleshill |
| Gloucester | Dudley |
| Great Malvern | Great Haywood |
| Ledbury | Lichfield |
| Newent | Norton Canes |
| Northleach | Penkridge |
| Pershore | Rugeley |
| Ross-on-Wye | Stafford |
| Stow-on-the-Wold | Tamworth |
| Stroud | Walsall |
| Tewkesbury | West Bromwich |
| Worcester | Wolverhampton |