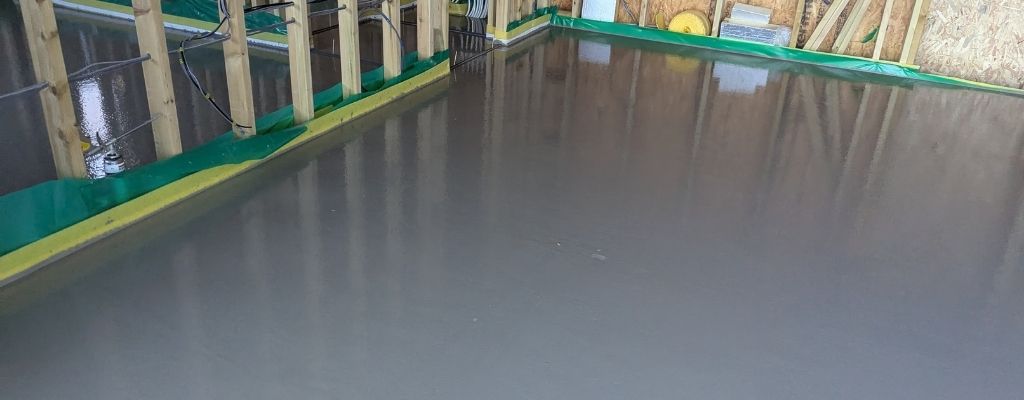

Liquid screed floor preparation is vital if you want to ensure a smooth, flawless finish and a floor that stands the test of time. Rushing through the preparation work can lead to cracks, uneven surfaces, or even issues with drying times, none of which you want to deal with later!
The good news is that liquid floor preparation isn’t as complicated as it sounds. With the proper steps in place, you can ensure a strong, level, and long-lasting surface. Whether you’re a DIY enthusiast or a professional looking for a quick refresher, this guide will walk you through everything you need to know about liquid screed floor preparation.
✅ Order liquid screed today
✅ Free, fast quote within 24 hours
✅ Call, message or complete our simple online form
Flowmix Tewkesbury: Tel: 01684 217888 Flowmix Walsall: Tel: 01922 741731
Step 1: Sub-Floor Preparation
First things first for liquid screed floor preparation. Make sure your sub-floor is clean and smooth. Scrape off any debris, dried mortar, or anything else that could create an uneven surface.
Once that’s done, give the entire area a good sweep. For the best liquid screed floor preparation, you want a nice, flat, dust-free surface before laying the insulation down.
A little extra effort at this stage will go a long way in ensuring a perfect finish!
Step 2: Installing Insulation
For the best results with liquid screed floor preparation, try to lay the insulation in two layers. Start by placing the first layer between any service pipes on the subfloor. To keep things stable, fill any gaps around the pipes with dried sand as this helps create a level and even base.
Once that’s sorted, lay the second layer on top, making sure to stagger the joints. The goal is to keep everything flat and stable, with no movement or rocking.
If there isn’t enough depth for two layers, don’t worry! Just use a single layer of insulation and still fill any voids with dried sand.
Instead of a second insulation layer, make sure the sand sits level with the insulation boards. Then, cover it with a polythene strip and secure it in place with duct tape. That will help keep everything in place and ready for the next step!
Read: Screed and Underfloor Heating: A Complete Guide
Need Expert Advice?
Speak to the team at Flowmix Tewkesbury or Walsall. We are happy to help with all your concrete requirements.
Flowmix Tewkesbury: 01684 217888 Flowmix Walsall: Tel: 01922 741731
Step 3: Installing the Edge Strip and Plastic Membrane
Now, it’s time to install the edging strip. Run it along all internal and external walls, ensuring it fits snugly into the corners at perfect 90-degree angles. To keep it in place, use a staple gun, nails, screws, or duct tape, whichever works best for the surface you’re fixing it to.
Next, lay a 500-gauge polythene membrane over the insulation. Pull it tight to avoid creases, and make sure the joints overlap by at least 100mm. Once everything is in position, tape all the joints securely.
Finally, seal the membrane by taping it to the plastic skirt of the edging strip. This step helps create a proper barrier, keeping everything in place and ready for the screed!
Step 4: Pipe Installation
Now, it’s time to install the underfloor heating pipes. Ensure they’re securely fixed every 400mm along their length, and use clips or staples more frequently on the bends to keep everything in place.
After laying the pipes, fill them with water and pressurise the system to between 5-10 bar at least 2-3 days before the screed goes down. This step is crucial because it helps keep the pipes firmly in position and allows you to check for leaks before installation.
A little extra care here ensures a smooth and trouble-free finish!
Ready to Order Liquid Screed?
✅ Order liquid screed today
✅ Free, fast quote within 24 hours
✅ Call, message or complete our simple online form
Flowmix Tewkesbury: Tel: 01684 217888 Flowmix Walsall: Tel: 01922 741731
Step 5: Expansion Joints (Optional) & Final Check
The final optional step for liquid screed floor preparation is to install expansion joints across doorways and in areas where the aspect ratio exceeds 1:6. To ensure a level fit over the underfloor heating pipes, cut small notches on the underside of the joints. Then, create V-shaped notches on the top as this helps the screed flow evenly through the joint, maintaining a consistent level on both sides.
Before pouring the screed, thoroughly clean the entire area. Brush or vacuum any debris off the plastic membrane. Anything left behind could float to the surface and create blemishes once the screed hardens.
Finally, inspect the entire tanking system, check for any tears or untaped joints, and fix them as needed. Then, do a final depth check to ensure at least 25mm of screed covering all pipes, especially in the corners. Once everything is set, you’re ready for the screed!
Read: Professional Screed Delivery Services: 5 Key Benefits 2025
What’s a Tanking System?
A tanking system is a waterproof barrier that protects surfaces from moisture. Liquid screed flooring refers to the combination of the plastic membrane, edge strips, and taped joints that create a sealed layer over the insulation and underfloor heating.
The purpose of the tanking system is to:
- Prevent leaks – Ensures the liquid screed stays contained and doesn’t seep into gaps.
- Improve screed performance – Helps control moisture and drying time for a smooth, crack-free finish.
- Protect insulation & pipes – Keep everything securely in place before and during the screed pour.
Before pouring the screed, it’s crucial to check the tanking system for any tears, gaps, or untaped joints to avoid issues later on!
Conclusion
Proper liquid screed floor preparation is the key to achieving a smooth, level, and long-lasting liquid screed floor. By following a step-by-step approach, starting with sub-floor preparation, insulation installation, and securing the edge strip and plastic membrane, you can create a solid foundation for the screed.
Read: The Top 7 Benefits of Liquid Screed Flooring
Ensuring the correct installation of underfloor heating pipes and expansion joints (if needed) further enhances durability and performance. A final check before pouring helps eliminate debris, secure all joints, and confirm the correct screed depth.
For the best results, using high-quality liquid screed is just as important as proper preparation. Flowmix is a trusted liquid screed supplier, providing top-tier solutions to help you achieve a flawless finish.
Flowmix provides Gyvlon screed, Cemfloor, and traditional dry screed.
With the right materials and careful prep work, your flooring will be smooth, durable, and built to last! Please get in touch with the Flowmix team for guidance on liquid screed floor preparation.
How Flowmix Can Help With Your Project
Flowmix has two plants, Gloucester and Walsall. We provide the following services (with time slots):
✅ Ready-mix concrete, mix on-site (volumetric concrete)
✅ Traditional and liquid screed.
✅ Concrete line pump Hire to reduce manual labour and associated costs, increase efficiency, reduce wastage and clean up.
✅ Interlocking concrete blocks for temporary or permanent barriers.
✅ Mini-Mix loads up to 4 cubic metres.
Flowmix holds the BSA-approved Ready Mix Concrete Kitemark KM683844, a certification that “confirms a product or service’s claim has been independently and repeatedly tested by experts” (source BSI).
Flowmix Delivery Areas
| Tewkesbury | Walsall Plant |
| Bourton-on-the-Water | Aldridge |
| Brockworth | Barton-Under-Needwood |
| Chalford | Birmingham |
| Cheltenham | Brownhills |
| Chipping Campden | Burntwood |
| Cirencester | Burton Upon Trent |
| Droitwich Spa | Cannock |
| Evesham | Coleshill |
| Gloucester | Dudley |
| Great Malvern | Great Haywood |
| Ledbury | Lichfield |
| Newent | Norton Canes |
| Northleach | Penkridge |
| Pershore | Rugeley |
| Ross-on-Wye | Stafford |
| Stow-on-the-Wold | Tamworth |
| Stroud | Walsall |
| Tewkesbury | West Bromwich |
| Worcester | Wolverhampton |